Getting started
This section covers the initial steps to set up and use the robot arm.
General robot usage
- Power on.
- Open command line and connect to the robot.
- Homing calibration.
- Deactivate the robot.
- Activate the robot and start running process.
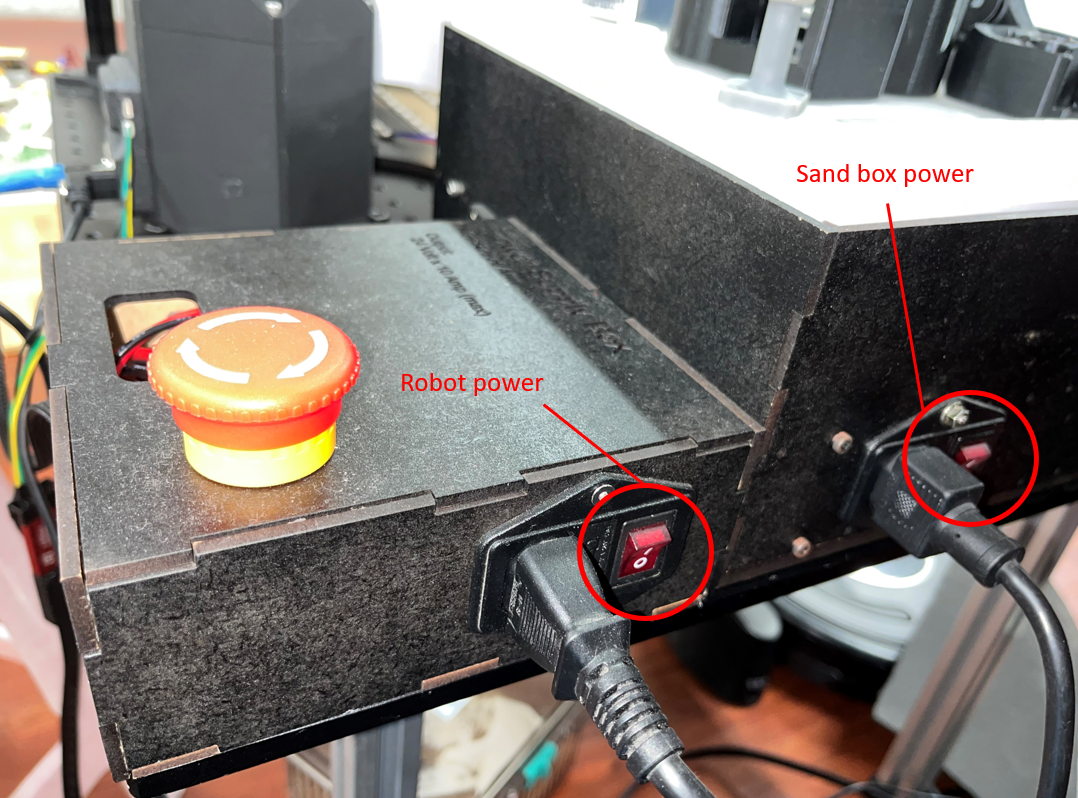
Powering on
Connect the wire to the 24V power jack and then open the switch of the robot power.
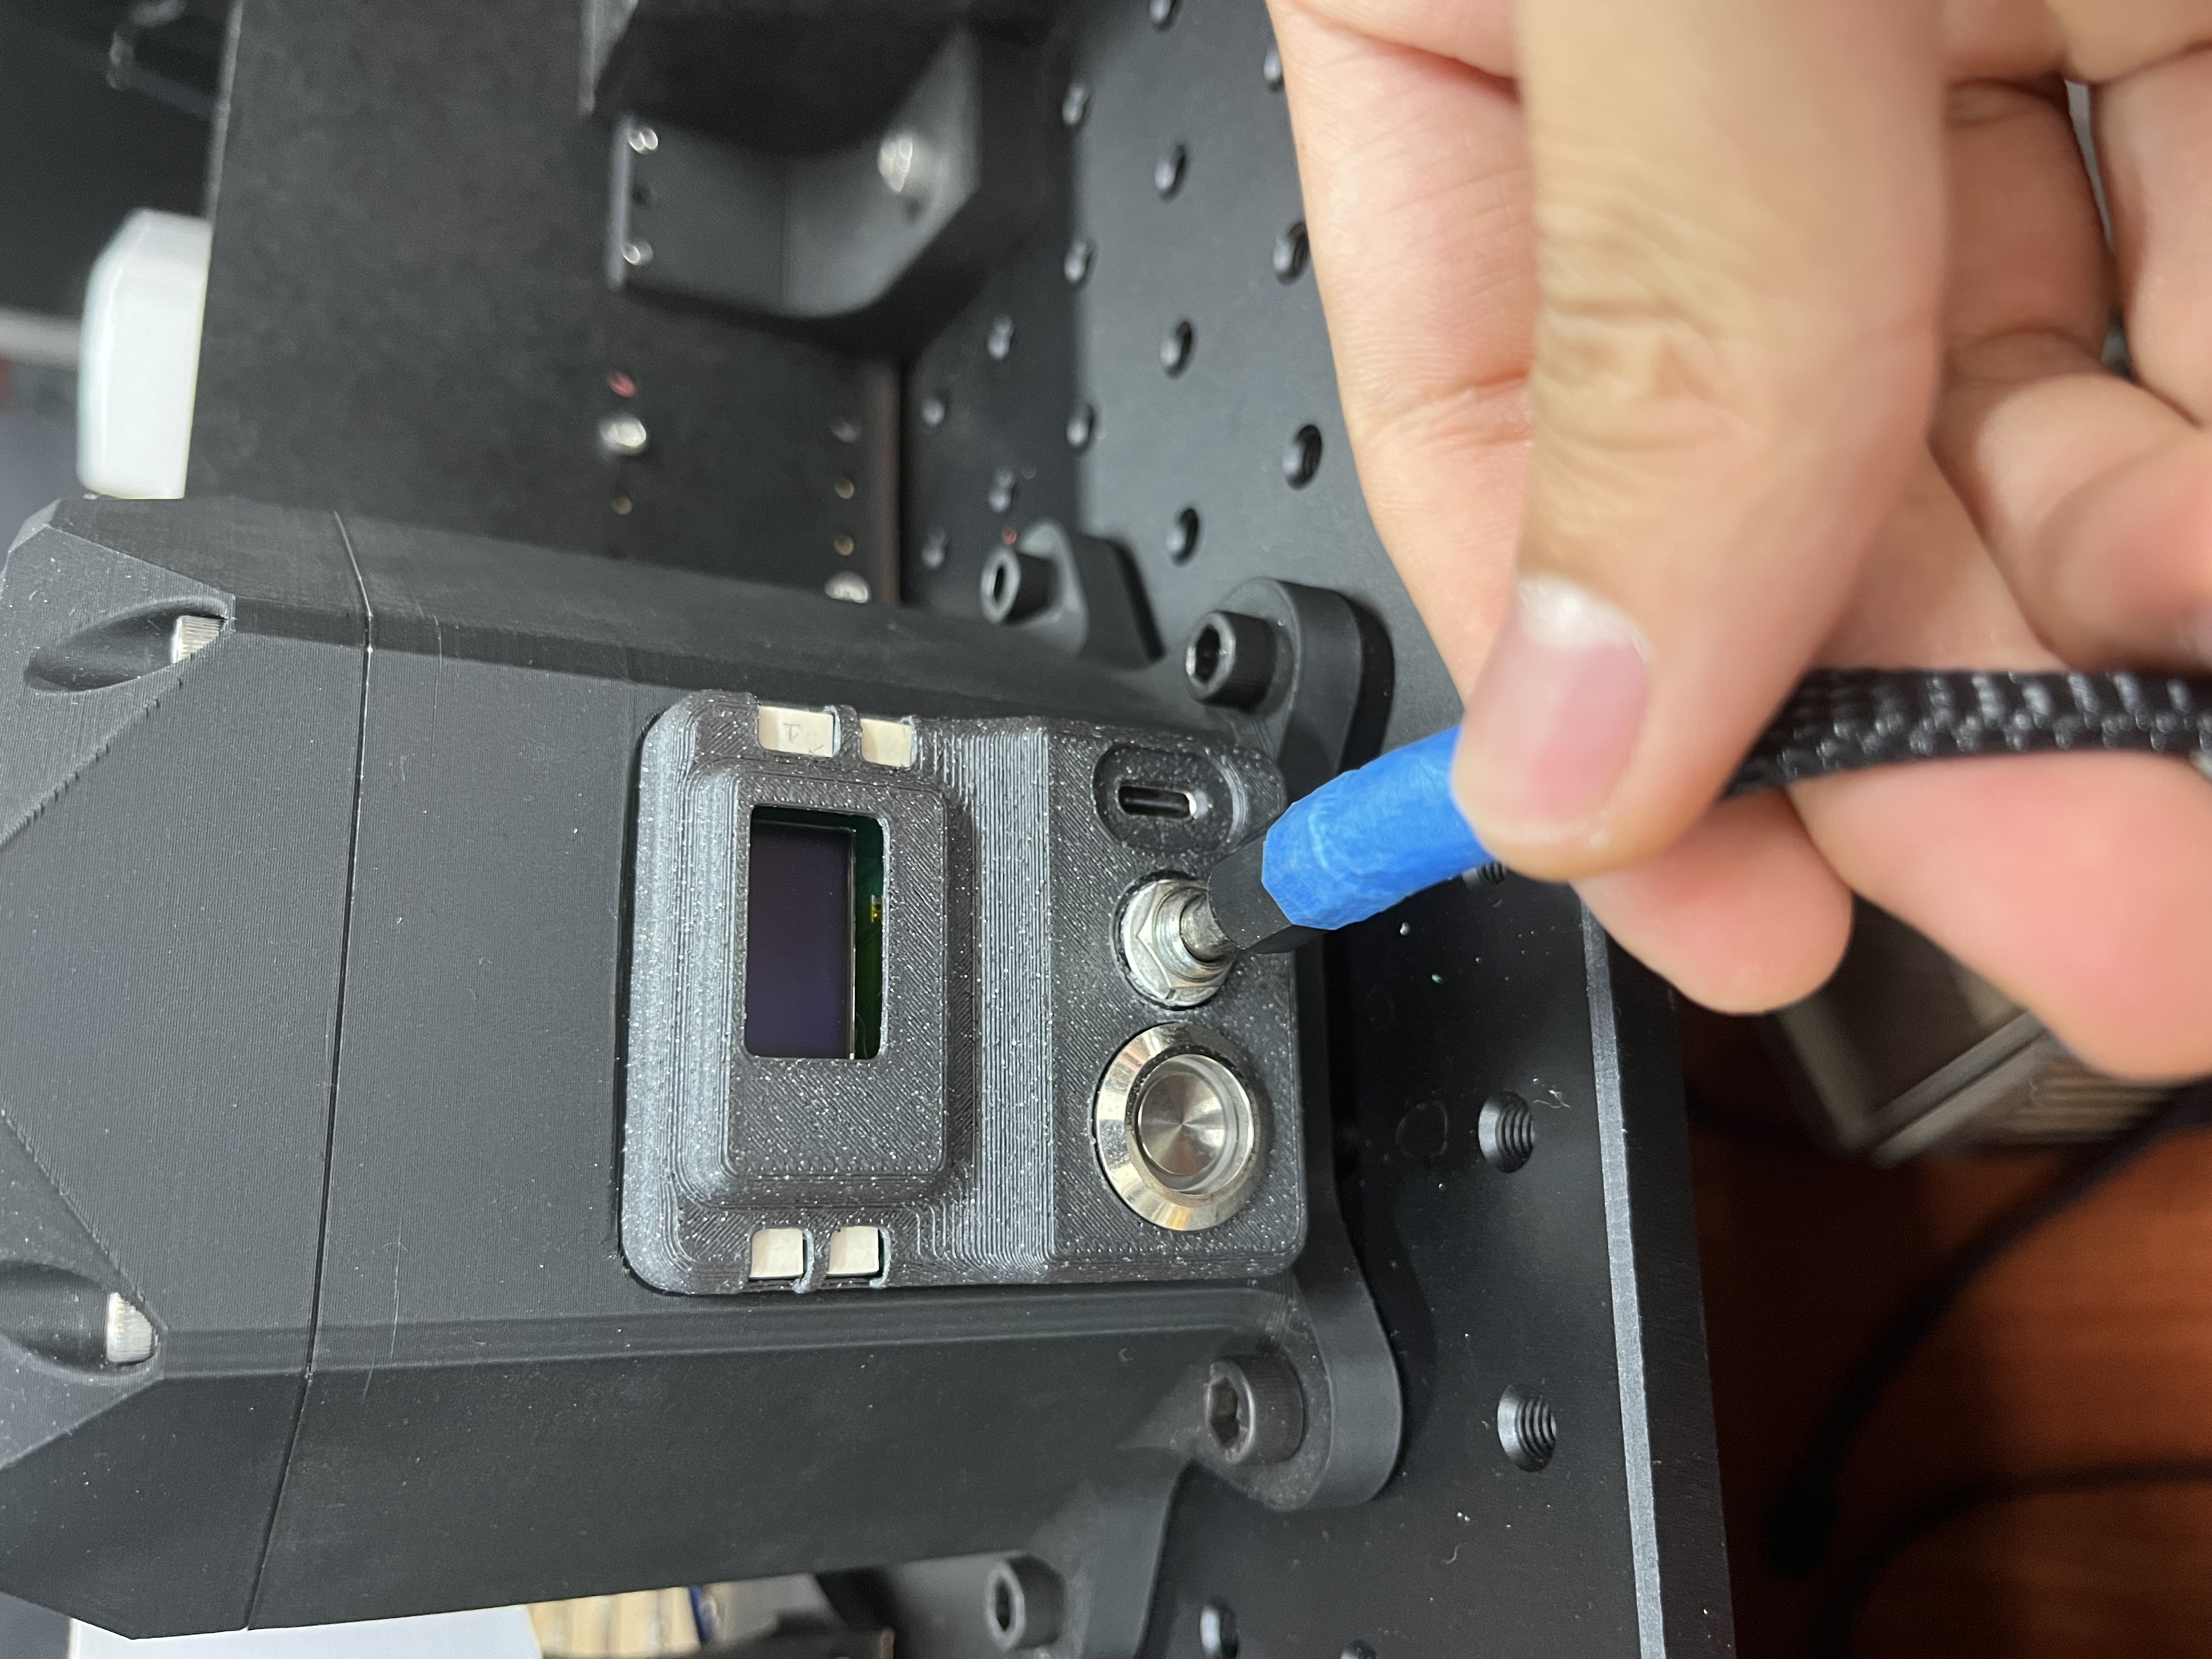
Open the switch of robot power.
Afterward, you should see the LED button light up and the REF board screen display some text.
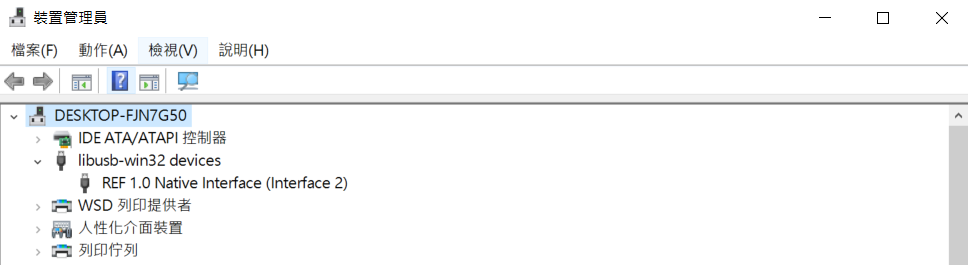
Connect to robot
First, check if your computer recognizes the device. Open the device manager, and you should see the device listed as shown below:
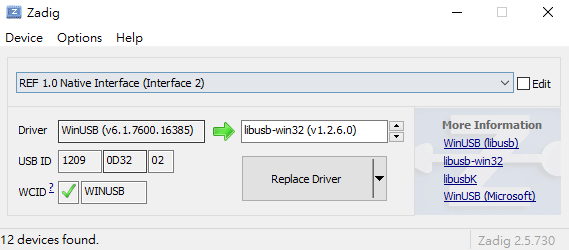
If not, you may need to manually install the USB driver. Follow these steps:
- Install Zadig and open it.
- In the options, choose "List All Devices".
- Find "REF 1.0 Native Interface (interface 2)".
- Select "libusb-win32".
- Select "Replace Driver" and wait for about 5 minutes.
Don't mess up with REF 1.0 Native Interface (interface 0)
After successfully recognizing the device, open your preferred Python IDE capable of coding. We'll use the CLI written by Peng-ZhiHui based on Fibre.
Open the folder of CLI-TOOL, and run "run_shell.py".
Then, after about 10 seconds, you should see the robot connected as "Dummy 0".
Commands
Here are some commands you can use:
- dummy0
- dummy0.robot
dummy0.robot.calibration_home_offset()
dummy0.robot.homing()
dummy0.robot.resting()
dummy0.robot.reboot()
dummy0.robot.set_enable(enable: bool)
// move only joint 6
dummy0.robot.move_ee(j6: float)
// move 6 joints with angles
dummy0.robot.move_j(j1: float, j2: float, j3: float, j4: float, j5: float, j6: float)
// move 6 joints with coordinates
dummy0.robot.move_l(x: float, y: float, z: float, a: float, b: float, c: float)
// move 6 joints without changing joint 6 current angle
dummy0.robot.move_l_ee(x: float, y: float, z: float, a: float, b: float, c: float)
dummy0.robot.set_joint_speed(speed: float)
dummy0.robot.set_joint_acc(acc: float)
dummy0.robot.set_command_mode(mode: int)
dummy0.robot.tuning
- dummy0.root.joint_x
dummy0.robot.joint_1.angle
dummy0.robot.joint_1.reboot()
dummy0.robot.joint_1.erase_configs()
dummy0.robot.joint_1.get_temperature()
dummy0.robot.joint_1.set_enable(enable: bool)
dummy0.robot.joint_1.set_enable_temperature(enable: bool)
dummy0.robot.joint_1.set_position_with_time(pos: float, time: float)
dummy0.robot.joint_1.set_position(pos: float)
dummy0.robot.joint_1.set_velocity(vel: float)
dummy0.robot.joint_1.set_velocity_limit(vel: float)
dummy0.robot.joint_1.set_current(current: float)
dummy0.robot.joint_1.set_current_limit(current: float)
dummy0.robot.joint_1.set_node_id(id: int)
dummy0.robot.joint_1.set_acceleration(acc: float)
dummy0.robot.joint_1.apply_home_offset()
dummy0.robot.joint_1.do_calibration()
dummy0.robot.joint_1.set_enable_on_boot(enable: bool)
dummy0.robot.joint_1.set_dce_kp(vel: int)
dummy0.robot.joint_1.set_dce_kv(vel: int)
dummy0.robot.joint_1.set_dce_ki(vel: int)
dummy0.robot.joint_1.set_dce_kd(vel: int)
dummy0.robot.joint_1.set_enable_stall_protect(enable: bool)
dummy0.robot.joint_1.update_angle()
General Usage
Using command line interface
At the base project directory, and run pyhthon ./src/main.py. Then input "C" or "c" you can enter the command line interface.
After waiting for about 5 seconds, the robot arm should show up in the command line. If not, please check the device manager if your computer recognize the robot arm correctly.
(Check out Connect to robot)
Then, you can type the command show above to make robot arm move. (make sure to do this after calibration and enabling the robot arm).

Running scripts
Key Process Alert
Remember to run this after you calibrate your robot and set your robot to homing position.
At the base project directory, and run pyhthon ./src/main.py. Then input "R" or "r" you can enter the script running interface.
You will be ask to provide path to your script, and after connect to robot, you can press enter to run the script.

Testing
For this part, we need to use the command line interface.
- Checking REF board
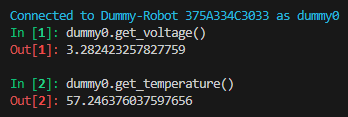
Check the current temperature of the REF board. If you type multiple times, the temperature should vary slightly. If not, there may be errors in the connection with the REF board.
Check the current voltage of the REF board. If you type multiple times, the voltage should vary slightly. If not, there may be errors in the connection with the REF board.
- Checking each joint
Rotate the stepper motor counterclockwise twice and clockwise once to calibrate the encoder.
Rotate the current temperature of the Motor board. If you type multiple times, the temperature should vary slightly. If not, there may be errors in the connection with the Motor board.
Encoder Calibration
For this part, we need to use the command line interface. Before homing calibration, calibrate each joint's encoder.
We need to run the command below through all the joints (1 ~ 6).
Then, check if the calibration is successful by rotating the motor using:
If the motor rotates without error, the encoder calibration is successful.
Homing Calibration
For this part, we need to use the command line interface.
Key Process Alert
Homing calibration is crucial for the robot arm's accuracy. Perform this process every time you power on the robot arm. It may take two to three attempts to calibrate the robot successfully.
By default, the robot arm homes in these steps:
- Ensure all joints are in the homing position, aligning each joint with the witness marks.
- Joints 2 and 3 move to rest position to test if they hit the end stops (this may fail sometimes).
- Joints 1, 4, 5, and 6 do not move during this process.
Deactivate and activate
For this part, we need to use the command line interface. After calibration, it's best to deactivate the robot. To do so, release all the motors:
To activate the robot again:
If you're using only one joint, you can use the joint command:
Powering off
To power off, simply close the connection by typing "quit" and then turn off the power switch. It's advisable to set the robot to the homing or resting position before powering off.